
Learning Common Procedures
Whether you are new to Sage 100, or an experienced user who wants to review basic and advanced concepts, this article gives you hands-on practice with common procedures.
Companies and users
These lessons describe some of the common tasks related to companies and users.
Many systems are set up with multiple companies to keep financial records for individual companies separate, and to separate real company data from test company data. Each company is identified by a unique, three-character company code. You can process information for a specific company by selecting the appropriate company code.
A user record must be created for anyone who needs to access Sage 100.
To create a company
-
Select > > Company Maintenance.
-
Enter a company code and company name.
-
Enter information in the fields appropriate to your company, including the federal ID number.
-
Click to activate one or more modules.
-
When asked to save the new company, click .
-
When the Activate Module window opens, select the module(s) to activate and click .
-
In Company Maintenance, verify that the modules you selected appear in the Activated Modules area of the window and then click .
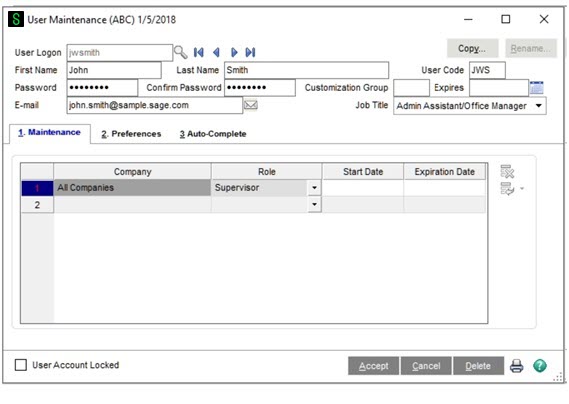
To create a user
-
Start User Maintenance. Depending on whether you purchased Sage 100 through a subscription, use one of the steps below:
-
Select > > User Maintenance.
-
Select > > User Maintenance.
-
-
Enter the user logon, first and last name, and user code.
-
If the Use Unified Logon check box is selected in System Configuration, the user logon must match the user’s Windows name.
-
Enter a password.
A password is required if the Require all Users to Enter a Password check box is selected in System Configuration.
-
On the Maintenance tab, select the company and role to assign to the user.
-
On the Preferences tab, select user-specific preferences.
-
If the auto-complete feature is enabled in System Configuration, change the default options on the Auto-Complete tab as needed.
-
Click .
User passwords can be changed for any user currently logged onto the system.
Users can change their own password if the Allow User to Change Password security option is selected for their role.
-
On the Sage 100 Desktop menu, click Change User Password.
-
In the Old Password field, type the current password for the user.
-
In the New Password field, type the new password for the user.
-
In the Confirm Password field, type the same password that was typed in the New Password field.
-
Click .
The User Settings window allows you to specify default options, such as the default zoom level when viewing reports.
To change user settings
-
Use one of the following methods to open the User Settings window.
-
On the Sage 100 Desktop menu, click Change User Settings.
-
On the Home tab in the ribbon, click .
-
-
Make changes as needed.
-
Click .
Accessing Modules and Tasks
The Sage 100 Desktop offers multiple ways to access modules and tasks. In addition to the lessons in this article, you can find more information in the Getting to Know the Desktop article.
Depending on your company settings, you may be asked to enter an accounting date before accessing Sage 100 tasks, or the module date may be set based on your computer's system date. The accounting date is printed on all reports, and represents the date to be used while posting transactions for the current module.
The Library Master accounting date is set from the Windows system date and cannot be changed.
The active module always displays on the Status Bar.
Note that modules automatically change when you select a task from another module using the Module Menus toolbar or Modules menu.
-
Use either of the following methods to open the Change Module window from the Desktop:
-
On the Status Bar, click the module.
-
On the Modules tab, click .
-
-
Select a module.
-
Click .
The new module displays on the Status Bar and the module menus change to reflect the specified module.
From the Desktop, you can open a task in a secondary company without changing the current company displayed on the Desktop Status Bar. You can select any company as the secondary company.
To open a task in the current secondary company
-
In the Desktop task pane, click if it’s not already selected.
-
Right-click a task, point to Open with, and then click Secondary Company.
The task opens in the secondary company.
To specify a different secondary company and then open the task
-
In the Desktop task pane, click if it’s not already selected.
-
Right-click a task, point to Open with, and then click New Secondary Company.
-
In the Company field, enter a company and then click .
The task opens in the secondary company.
Note: To define a new secondary company without opening a task, select Change Secondary Company from the right-click menu.
Using the Lookup's Basic Features
When entering data in certain fields in a maintenance or data entry window, you can click the Lookup button to display a list of valid records. This lesson contains basic procedures on how to use the Lookup feature. To learn more, see Using the Lookup's Advanced Features.
Use the Lookup feature to display a list of records and select the appropriate record.
To select a record using the lookup window
-
In a window, click a button. The lookup window appears displaying the available records.
-
Select a record and then click .

The record is then selected in the original window.
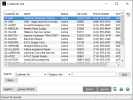
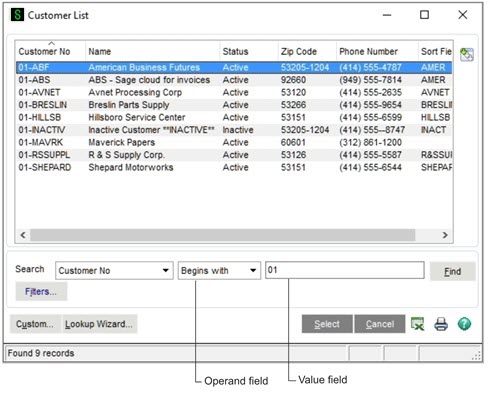
The lookup window provides a Search field and a Find button to narrow your search for desired records. This feature is a convenient way to reduce the number of records displayed and helps you to focus on pertinent records.
To search in the lookup window
-
In the lookup window, in the Search field, select the field to search.
-
In the Operand field, select an operand. For information about available operands, see Filter the Lookup Criteria in the Help.
-
In the Value field, type a search value for the lookup.
-
Click to run the search. The lookup list box displays the search results. In this example, the lookup searches and returns all customer numbers that begin with 01.
-
Select an item from the list box and click .
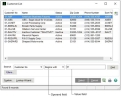
In any lookup window you can define additional criteria to filter the lookup, and you can save these filters so that they apply to future lookups until they are manually removed. Filtering the lookup criteria helps you narrow your search on desired fields.
Tip: There are two differences between filtering the lookup criteria and searching in the lookup. When filtering, you can define an unlimited number of filters on multiple lookup fields, and you can save these filters so that they always apply to the lookup. In contrast, when you perform a search in the lookup window, you can search on only one lookup field, and the search criteria cannot be saved.
-
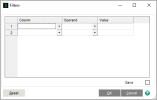
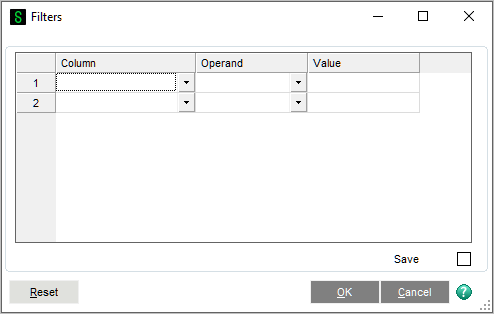
In the lookup window, click . In the Filters window, each line item is a filter consisting of a Column, Operand, and Value.
Note: Filters that are defined in the User Lookup Wizard and Lookup Customization Wizard also appear in this window. If the filter is locked, it cannot be changed. If the filter is not locked, it can be removed or modified.
-
In the Column field, select the lookup column you want to filter. The Column field reflects all of the columns defined for the lookup.
-
In the Operand field, select the appropriate operand. For information about available operands, see Filter the Lookup Criteria in the help.
-
In the Value field, type a value. If you enter multiple values separated by commas, the system assumes an "OR" condition.
-
To add additional filters, repeat steps 2 through 4. You can define an unlimited number of filters; multiple filters assume an "AND" condition.
-
To retain these filters for future lookups, select the Save Filters check box.
Note: If the Save Filters check box is cleared, the filters remain in the Filters window and remain in effect during the lookup; however, when you exit the lookup, these filters are removed.
-
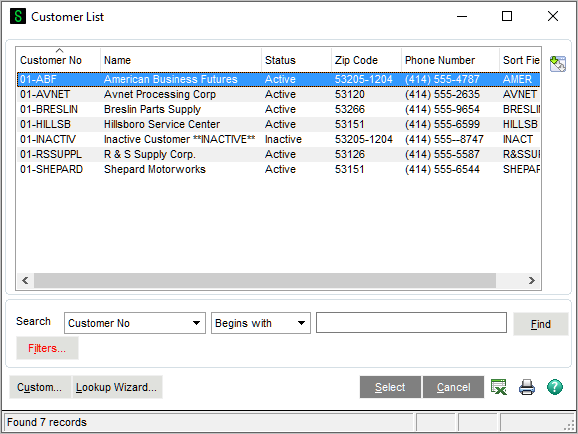
Click to apply the filters. In this example, the lookup returns all customers beginning with 01 and ZIP Codes beginning with 5.
You can delete filters after they have been defined.
-
In the lookup window, click .
-
To delete one filter, in the filter's Column field, select <none>. The filter row is cleared.
-
To delete all filters, click . The filters are cleared, and any filters from the custom lookup, if one exists, are restored.
-
Click .
Using the Lookup's Advanced Features
The Lookup has advanced features that allow you to create lookup views, create a numeric lookup field, modify a lookup field, and export lookup data to Excel.
Note: If another user is in the User Lookup Wizard and is creating or modifying a lookup code while you attempt to create or modify a lookup view, a message appears and prevents you both from continuing.
For each lookup by company and by user, you can create up to 99 unique views. When creating a lookup view, you can define your default view, add, remove, or modify fields in the lookup, add or remove filters, as well as define several other settings. After creating a lookup view, you can modify or delete the view at any time. Keep in mind that any search criteria or filters you previously defined will not apply to the new lookup view you create.
To create a lookup view
-
In the lookup window, click .
Note: The Custom button is not available if the Locked Customization check box is selected in the User Lookup Wizard.
-
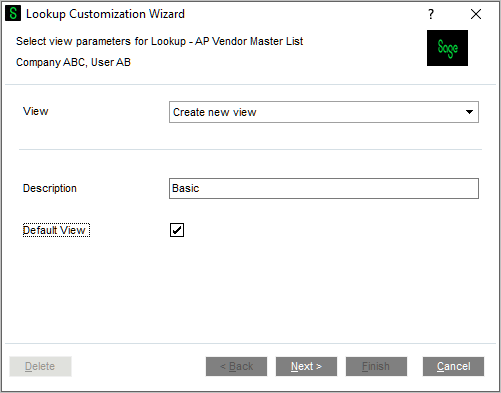
On the Lookup Customization Wizard page, in the View field, select and enter a description for the new view. Alternately, select an existing view to modify.
-
To set the new lookup view as the default view, select the Default View check box. Click .

-
In the second wizard page, add, remove, modify, or reorganize the fields for the lookup view in the Selected Columns list box.
In this example, the TelephoneExt and LastPurchaseDate fields have been added to the Selected Columns list box, and the ZIP Code field has been moved to the Available Fields list box.

Note: The first column indicated by an asterisk (*) in the Selected Columns list box cannot be removed; however, it can be modified.
-
Click to define additional settings, or click if you have completed customizing the view.
-
Use the third Lookup Customization Wizard page to add, delete, or modify filters. To continue defining additional settings, click Next; otherwise, click Finish.

-
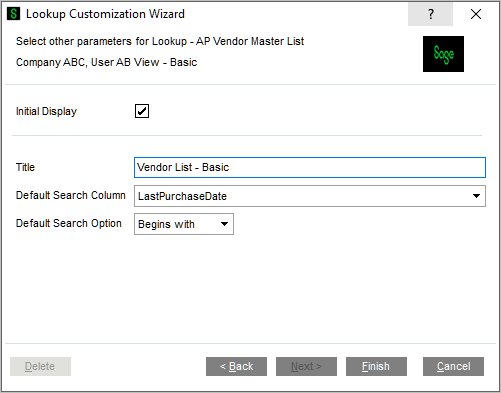
In the final Lookup Customization Wizard page, make any final changes to the lookup view.
-
Select the Initial Display check box to load data in the lookup at run time. If you do not want data initially loaded in the lookup at run time because you have a large number of records and want to perform a search before displaying records, clear this check box.
-
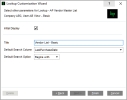
In the Title field, type a new title that will display in the lookup window title bar.
-
In the Default Search Column field, select a default field to appear in the Search field in the lookup window.
-
In the Default Search Option field, select a default field to appear in the Operand field in the lookup window.
-
-
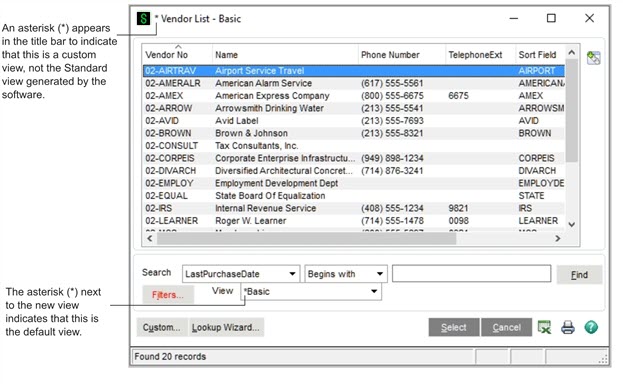
Click to see your newly created lookup view.
-
The View field appears in the lookup window and the new view, Basic, displays the newly added fields. In the example below, the new fields are TelephoneExt and LastPurchaseDate, while the deleted ZIP Code field no longer appears.
Also, the title bar displays Vendor List - Basic because this title was entered in the Title field in the last page of the wizard and was set as the default view.


You can create numeric fields to add to the Selected Columns list box in the second Lookup Customization Wizard page. Numeric fields are created by combining two or more fields together using arithmetic operators.
To create a numeric lookup field
-
In the second Lookup Customization Wizard page, click to create a new numeric field using simple arithmetic functions.
-
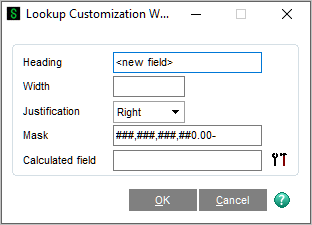
In the Lookup Customization Wizard - New Field window, in the Heading field, enter the name for the field.
-
Enter the width and select the justification.
-
Enter the mask.
-
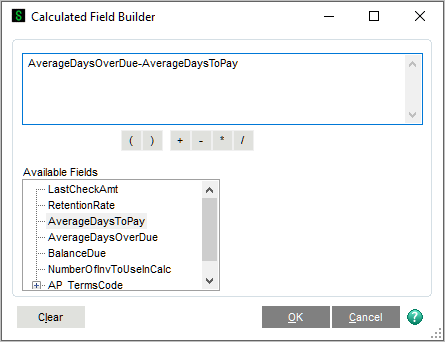
Click the button to enter simple arithmetic calculations in the Calculated Field Builder window.
-
Double-click a field in the Available Fields list. This moves the field to the expression area. Select an operator, choose another field from the list, and then click .

-
In the Lookup Customization Wizard - New Field window, click . The newly created field automatically appears as a column in the Selected Columns list box.
-
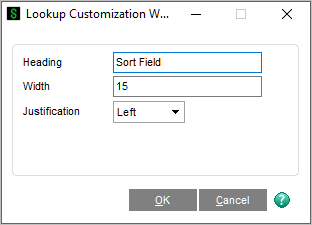
In the second Lookup Customization Wizard page, click to alter the selected field in the Selected Columns list box.
-
In the Lookup Customization Wizard - Modify window, make the desired changes and click .
For example, you can change the width of the key field to zero if you do not want to display it in the lookup.
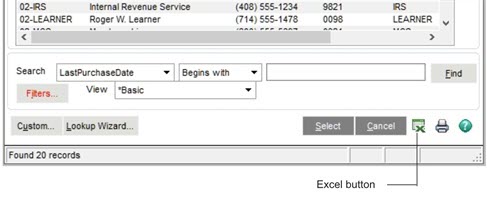
You can export the data displayed in a lookup window to Excel if you have the appropriate security setup. You can also select a customized lookup view or perform a search in the lookup window to display specific records, and then export the data to Excel.
To export lookup data to Excel
-
In the lookup window, display the data to export to Excel.
-
Click the button. The data in the lookup window is exported to Excel.
Printing Reports, Listings, or Forms
All reports can be printed, exported or written to a file, and stored for deferred printing. You can print a report to a variety of printers or output devices. Additionally, reports can be viewed before printing using the Preview feature.
-
In the task window that has the Listing feature available (for example, General Ledger Options), make the needed selections to the criteria in the window and then click .
-
In the listing window that appears, in the Printer field located in the lower-left corner of the window, select the printer.
You can also select alternative printing methods, which are available in the Printer field, including:
-
Export/E-mail: Reports can be exported to different file types, such as PDF or Excel, and saved to your hard drive or e-mailed. For more information, Exporting or Printing to a File.
-
Data Only Export: This option allows only the data portion of the report to be exported (header information is excluded). For more information, Exporting or Printing to a File.
-
Deferred: Report printing can be deferred allowing you to save reports on your hard drive for printing at a future time. For more information, Using Deferred Printing.
-
Office Merge: If the Custom Office module is installed, you can merge your data into a template such as a Microsoft Word or Excel template before printing.
-
-
Click to print the listing.
Tip: You can click to review the listing before printing.
-
In the report or form window, select either a report setting or a form code.
-
You can either accept the default settings for the current report setting or form code, or create a new report setting or form code. For more information, see Creating a Report Setting.
Note: The standard set of reports and forms are assigned a report setting of Standard.
-
In the Printer field located in the lower-left corner of the window, select the printer.
You can also select alternative printing methods, which are available in the Printer field, including:
-
Export/E-mail: Reports can be exported to different file types, such as PDF or Excel, and saved to your hard drive or e-mailed. For more information, see Exporting or Printing to a File.
-
Data Only Export: This option allows only the data portion of the report to be exported (header information is excluded). For more information, see Exporting or Printing to a File.
-
Deferred: Report printing can be deferred allowing you to save reports on your hard drive for printing at a future time. For more information, see Using Deferred Printing.
-
Office Merge: If the Custom Office module is installed, you can merge your data into a template such as a Microsoft Word or Excel template before printing.
-
-
After selecting or modifying the report setting or form code, click to print the report or form.
Tip: You can click to review the report before printing.
Using Deferred Printing
Deferred printing allows you to save reports on your hard drive for printing at a future time. You can batch print multiple reports at one time without operator intervention between reports. You can also specify the number of copies to print for each report, as well as whether to retain the deferred report information for future use after printing. In a multi-user environment, this feature can postpone the report printing process if printers are not currently available, or it can speed up the posting process.
You must first set up reports to be deferred for future printing.
To defer the printing of a report
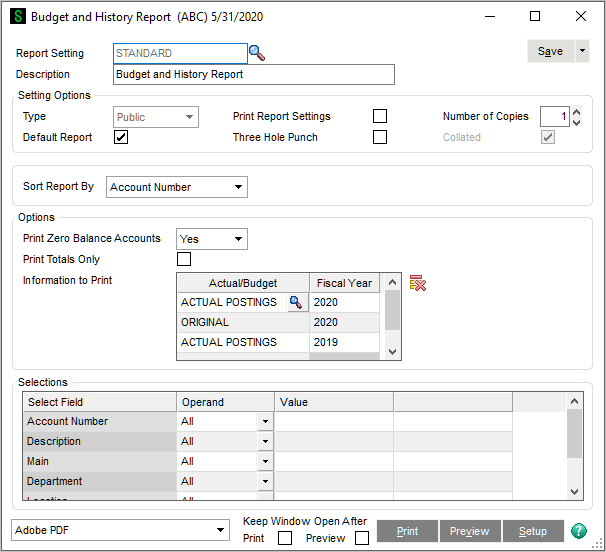
-
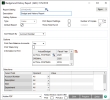
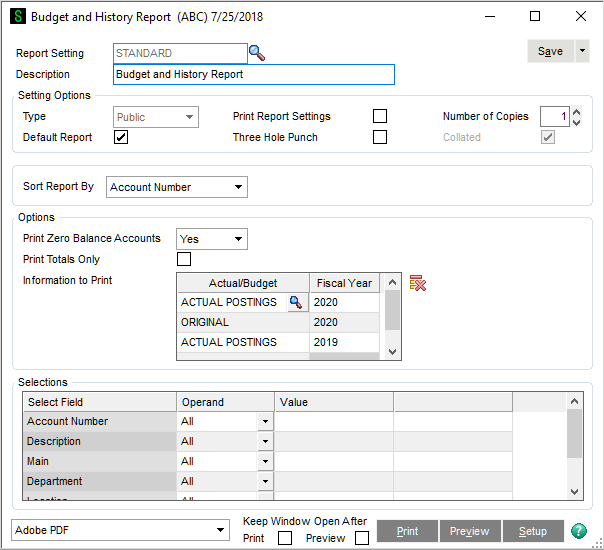
Access the report to defer (for example, the Budget and History Report in the General Ledger module) and select the report options.
-
In the Printer field, select Deferred and the click .
-
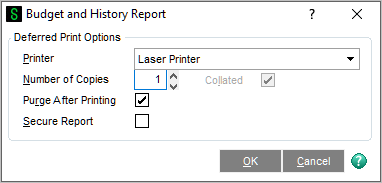
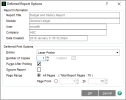
In the Deferred Print Options window, enter the number of copies to print.
-
Select or clear the Purge After Printing check box to either purge or retain the report after printing.
-
Select the Secure Report check box to restrict other users from printing the report.
-
Click .
The report is generated in a deferred print file and can be printed at a later time.
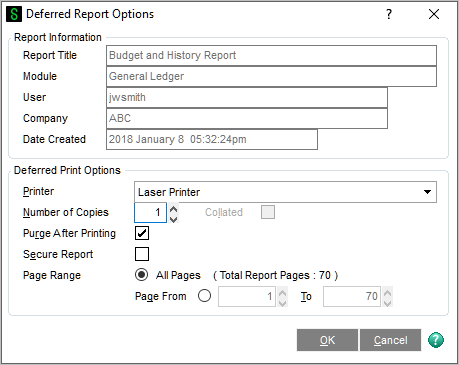
You can print one page of a deferred report or a range of pages. In addition, you can print several copies of a report and more than one report at a time. If a report is secured, only the user who initially deferred the report can print it.
-
To access and print deferred reports from the Sage 100 Desktop, use either of the following methods:
-
On Home tab in the ribbon, click the button.
-
On the menu, click Deferred Printing.
-
-
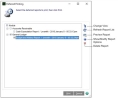
In the Deferred Printing window, select the report(s) to print.
-
To print all deferred reports, select the Module check box.
-
To print deferred reports for a specific module, select the module's check box. For example, select the General Ledger check box to print all deferred reports in the General Ledger module.
-
To print only selected reports, select each report check box individually.
-
-
To preview a report, select the report and click the button.
-
To export the report to a different file type, click the button in the report preview window.
-
To change printing options for a specific report, select the report and click the button.
In the window, change the information as needed and then click .
-
In the Deferred Printing window, click to print the selected reports to their assigned printers.

Exporting or Printing to a File
Reports can be exported to other files types, such as CSV, Excel, or PDF, and they can be saved to your hard drive or e-mailed. You can also export only the data portion of reports (header information is excluded).
-
Access the report to export and select the report options.
-
In the Printer field, select one of the following options:
-
Export: Select this option to export the entire report.
-
Data Only Export: Select this option to export only the data portion of the report (header information is excluded).
-
-
Click .
-
In the Export window, in the Format field, select the file type for exporting.
-
In the Destination field, select the location you are exporting to. For example, you can export the report to your hard drive or to an application such as Excel.
-
Click .
To send a fax from the software, a fax driver must be loaded in the Windows workstation environment. The fax driver acts as a printer driver in the software.
-
Access the report and set the report options.
-
In the Printer field, select the fax driver.
-
Click .
-
In the report preview window, click the button.
-
In the Print window, click .
-
A wizard or window applicable to your fax software opens. Enter the necessary information, such as the recipient’s fax number, and send the fax.
Paperless Office
You can use the Paperless Office module to fax, e-mail, and store forms in PDF format. The Paperless Office module allows you to set up PDF storage and electronic delivery options for documents in all Sage 100 companies. You can specify separate settings for journals and registers, reports, period-end reports, and forms.
This module also contains viewers in which you can view, move, delete, and electronically deliver PDFs of customer forms, vendor forms, journals and registers, standard reports, and period-end reports.
Purge utilities are also included which allow you to purge PDF documents as needed.
You do not need to enable this module in Company Maintenance; however, you must enable Paperless Office functionality for each type of document you would like to store and electronically deliver. For more information, see Set Up Paperless Office in the Help system.
Batch Faxing
Batch faxing allows you to fax multiple forms in batches. During the faxing process, forms addressed to the same fax number are collected and sent as a group with one cover letter. Batch faxing is set up using Batch Fax Options or Fax Form Definition, and requires either the Microsoft Fax Services or WinFax 10 fax driver.
Forms printed using the following tasks are supported for batch faxing: Statement Printing, Accounts Receivable Invoice Printing, Customer RMA Printing, RMA Receiver Printing, Sales Order Printing, Picking Sheet Printing, Sales Order Invoice Printing, and Purchase Order Printing. For more information, see Fax Multiple Forms in Batches in the Help system.
Setting Printing Preferences for Dot-Matrix Printers
To achieve optimum printing speed for dot-matrix printers, native fonts can be selected through the Windows driver to increase print speed.
Some printer drivers may only have the Default selection available for the font. If this is the case, you must download an updated driver for your printer from the printer manufacturer's Web site or select another compatible driver emulation (refer to your printer manual or consult a printer manufacturer for details). Each printer has unique font options available. Most native font selections will print faster than the Default font selection.
-
Select > > Printer Preferences.
-
In the Printer Preferences window, select the dot-matrix printer from the printer list.
-
Clear the Enable Graphics Printing for this Printer check box. This setting is specific to the printer and overrides the global setting.
-
Select the Show Native Printer Fonts Only check box. This is a temporary filter and must be selected each time you access this window to change a font.
-
In the Normal Font Name field, select 10 CPI Draft, 10 CPI Courier (not Courier New), or any font other than Default.
-
In the Normal Font Size field (to match the font selected in the Normal Font Name field), select 10.
-
In the Compressed Font Name field, select a font based on the following:
-
If you are using 8.5- x 11-inch paper on a standard-carriage printer, or 8.5- x 11-inch paper on a wide-carriage printer, select 17 CPI Draft,
17 CPI Courier (not Courier New), or any font other than Default. -
If you are using 11- x 14-inch paper, select a value between 10 and 15 (this setting may vary, depending on which printer driver you are using).
-
-
Click .
Creating a Report Setting
After selecting the options and selection criteria for a report, you can save these selections for future use by using a unique report setting. You can create and save any number of customized report settings per report and company. Use this procedure to save a report setting based on an existing report setting.
-
In the report window, in the Report Setting field, select the setting to use as the basis for your new setting.
-
To save the report setting based on another report setting, modify the settings in the report window, click the drop-down arrow next to the button, and select . You can also save the current report setting by clicking .
The settings for the standard set of reports included with Sage 100 cannot be modified. The settings made in the report window will revert back to the previous Standard settings. If you’ve made changes to the settings, when you click Save, the Save As Report Setting window opens allowing you to save the changes using a different setting name.
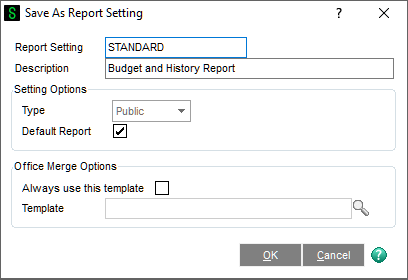
-
In the Save As Report Setting window, in the Description field, enter the description for the report setting you are saving.
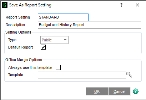
-
In the Type field, select the report type option.
-
To save the report setting as your default report setting, select the Default Report check box.
-
To set advanced settings for the report setting, perform the following steps:
-
Click .
-
In the Advanced Setting window, select either the Standard or Custom option to use a standard or custom report when printing the report.
-
If you selected the Custom option, enter the path to the custom report and click .
-
-
In the Save As Report Setting window, click to save the report setting.
Changes made to an existing report setting are saved to a new report setting name or to the current report setting name. The report setting that you created will be available in the Report Setting field in the report window for future use.
Note: Report and form printer information is retained by workstation and form code. When a new report setting or form code is created, the workstation ID and printer information is retained.
Setting Up Sage Intelligence Reporting
Sage Intelligence Reporting shows your Sage 100 data in Excel templates, which you can view and customize.
Sage Intelligence Reporting is installed by default when you install Sage 100 and run Workstation Setup. If you modified the default installation setting, you can install Sage Intelligence Reporting at any time. Refer to the Sage 100 ERP Installation and System Administrator’s Guide for installation instructions.
Before using Sage Intelligence Reporting, you must set up a repository and register the product.
The repository will be used to store Sage Intelligence Reporting data, reporting trees, report templates and other settings. Centralizing this information in one folder has the following advantages:
-
Using a single folder makes it easier to back up and restore the information.
-
Multiple users can access the information.
- Create a shared folder to serve as the repository. The folder can be created locally or on a network; however, you must use a UNC format when entering the repository path:
\\server\share name\repository folder name
-
Grant Sage Intelligence Reporting users read and write permissions to the folder.
-
Open the Report Manager from within Sage 100. Select > > Report Manager.
-
When the window appears asking for the path to the repository, enter the UNC path to the shared folder that you created, and then click .
-
When a window appears asking you to run the license manager, click .
-
In the License Manager window, enter your Sage customer account number and serial number, and then click .
-
The serial number is also referred to as an unlocking key. If you do not have your serial number, see Finding Your Serial Number.
-
Click .
Click the button on any Sage Intelligence Reporting window for detailed information about the product’s features.
If you do not have your Sage Intelligence Reporting serial number, you can find it online at: https://customers.sagenorthamerica.com. You’ll need your user name and password.
To find your Sage Intelligence Reporting serial number
-
Log on to the Sage Customer Portal.
-
On the menu, click Details.
-
In the Product Details grid, in the Application column, look for Intelligence Report Mgr. Your serial number is in the Unlocking Key column.
The serial number is case-sensitive. All special characters must be copied or typed into the License Manger window exactly as they appear in the Product Details grid.
You may have additional Sage Intelligence Reporting components listed in the grid. The serial number for the Intelligence Report Mgr component will unlock all of the components.
Setting Up Sales Tax Information
Depending on the states in which you conduct business and the type of business you have, you may be required to calculate sales tax on items sold and items purchased. The software allows you to calculate, track, and report sales tax information. To calculate sales tax, you must define information in Sales Tax Class Maintenance, Sales Tax Code Maintenance, and Sales Tax Schedule Maintenance. Sales tax information defined in these tasks is available to all companies.
The setup of sales tax information consists of the following four-part process:
-
Defining Sales Tax Classes: The tax class is used to define tax classifications. These tax classes are then assigned to each sales code, inventory item and miscellaneous charge code.
-
Defining Sales Tax Codes: The tax code is used to define whether a tax class is taxable. It is also used to define a tax rate, if applicable.
-
Defining Sales Tax Schedules: A tax schedule groups individual tax codes.
-
Assigning Sales Tax Schedules: Tax schedules are assigned to each vendor and customer based on the vendor's location or purchase address and the customer's location or ship-to address.
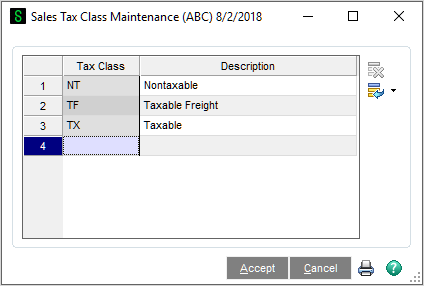
Defining a Sales Tax Class
The first step in defining sales tax information is to define different types of tax classifications in Sales Tax Class Maintenance. The following three tax classes are defined automatically by the system and cannot be deleted: Nontaxable (NT), Taxable (TX), and Taxable Freight (TF). A tax class must be defined for each classification of goods and services that are taxed at different rates.
Note: The TF (Taxable Freight) tax class is used to calculate sales tax on freight amounts.
-
Select > > Sales Tax Class Maintenance.
-
Enter a class in the Tax Class field.
-
In the Description field, type a description for the tax class and click Accept. Repeat steps 2 and 3 for each tax class you need to define.
After defining sales tax classes, assign the tax classes to sales codes, inventory items, and miscellaneous charges.
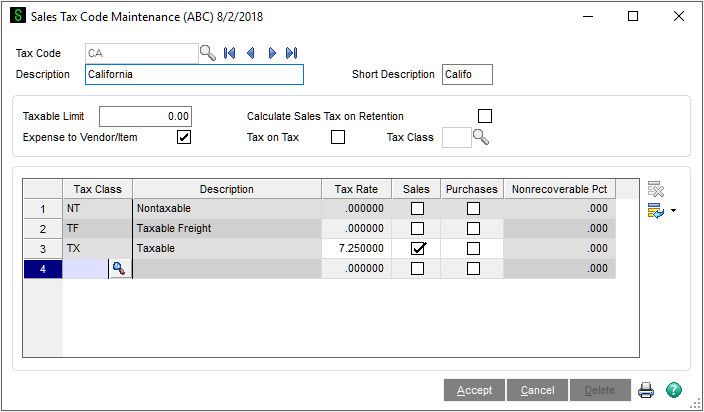
Defining a Sales Tax Code
After defining tax classes, you must define sales tax codes in Sales Tax Code Maintenance. You must set up a tax code for each tax jurisdiction (such as state, county, local or province) to which your business reports sales tax information. The defined sales tax codes determine the rate to calculate for each tax class defined in Sales Tax Class Maintenance and are used to determine if sales tax is calculated on both items sold and purchased.
-
Select > > Sales Tax Code Maintenance.
-
Enter a code in the Tax Code field and type a description in the Description and Short Description fields.
The short description will be used when printing tax detail on forms.
-
If the tax code you are defining has a limit, type it in the Taxable Limit field. For example, some tax jurisdictions have a limit for the amount of sales tax that can be defined on an invoice, sales order, or receipt.
-
Complete one of the following options:
-
Select the Calculate Sales Tax on Retention check box to calculate sales tax on the invoice amount less retention.
-
Clear the Calculate Sales Tax on Retention check box to calculate the sales tax on the full invoice amount, regardless of retention. For more information, see Sales Tax Code Maintenance - Fields in the help.
Note: The Calculate Sales Tax on Retention check box is available only if the Job Cost module is installed.
-
-
Complete one of the following options:
-
Select the Expense to Vendor/Item check box to allocate the non-recoverable portion of purchase's sales tax to the vendor's expense account in Accounts Payable or to the inventory account in Purchase Order.
-
Clear the Expense to Vendor/Item check box if the non-recoverable portion is not to be allocated. For more information, see Sales Tax Code Maintenance - Fields in the Help system.
-
-
Complete one of the following options:
-
Select the Tax on Tax check box if this tax code is subject to taxation by other tax jurisdictions. Then enter a class to be used for tax-on-tax calculations in the Tax Class field (next to the Tax on Tax check box).
-
Clear the Tax on Tax check box if the tax code is not subject to tax on tax. For more information, see Sales Tax Code Maintenance - Fields in the help.
Note: The Tax Class field next to the Tax on Tax check box is the only place you can enter a tax-on-tax tax class; you cannot enter this in Sales Tax Class Maintenance.
-
-
For each tax class defined (except for tax class NT which cannot be maintained or deleted), complete the following:
-
Select the Sales check box to calculate sales tax for this code, or clear the Sales check box if sales tax should not be calculated.
-
In the Tax Rate field, type the tax rate percentage to use for calculating taxes.
-
Select the Purchases check box if purchases are taxable for the tax class entered and proceed. Clear the Purchases check box if the purchases are not taxable and skip the next step.
-
If the Purchases check box is selected, type the percentage of the purchase tax that cannot be recovered in the Non-Recoverable % field.
-
Type 0 (zero) in this field if all purchases sales tax is to be posted to the Accounts Payable sales account.
-
Type 100 in this field to post all of the purchases sales tax to the non-recoverable account.
-
Note: If your tax jurisdiction charges tax on freight, you must set up a tax rate for the TF tax class in each applicable tax code.
-
-
Click . The following example shows a rate of 7.25, which will be calculated for items assigned to the Taxable (TX) tax class for items sold.
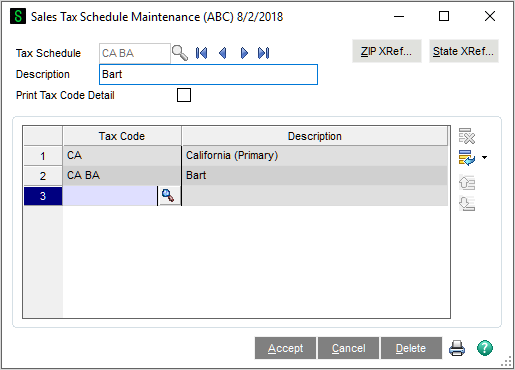
Defining a Sales Tax Schedule
After defining sales tax codes, use Sales Tax Schedule Maintenance to group tax codes that make up a total sales tax rate for assignment to customers and vendors, and to establish whether tax detail will print on sales orders and invoices. For example, if a specific county requires that you calculate both state and county tax, create a sales tax schedule that groups the state and county tax together.
-
Select > > Sales Tax Schedule Maintenance.
-
Enter a schedule in the Tax Schedule field and type a description in the Description field.
-
In the Tax Code field, enter a tax code to add to this tax schedule and then click .
Repeat this step for each tax code you want to add to the tax schedule.
The sequence in which the tax codes are entered is very important because of tax-on-tax calculations and the establishment of the primary tax code. If a tax code is taxable by another tax code, it must be calculated first.
For example, if tax code CA is taxable by tax code OR, CA would have to be calculated first to get an accurate calculation for the OR tax code. The first tax code entered will become the primary tax code. The primary tax code is used during the calculation of taxable and nontaxable amounts on each invoice and printing/updating of sales tax history.
-
Click .
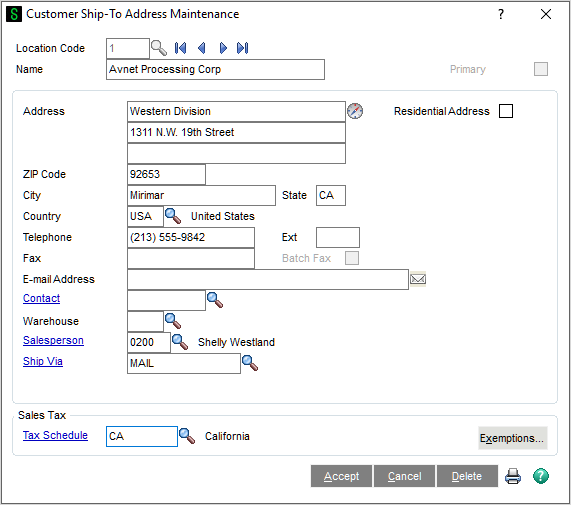
Assigning a Sales Tax Schedule
After sales tax schedules are defined, use Customer Ship-To Address Maintenance and Purchase Address Maintenance to assign each customer and vendor address to a default tax schedule. Default tax schedules can be changed when entering transactions.
-
Select > > Customer Maintenance.
-
Enter the customer number.
-
Click the drop-down arrow in the top-right corner of the window, and then click Ship To Address.
-
In the Customer Ship-To Address Maintenance window, enter a location code.
-
In the Tax Schedule field, enter a sales tax schedule and then click .
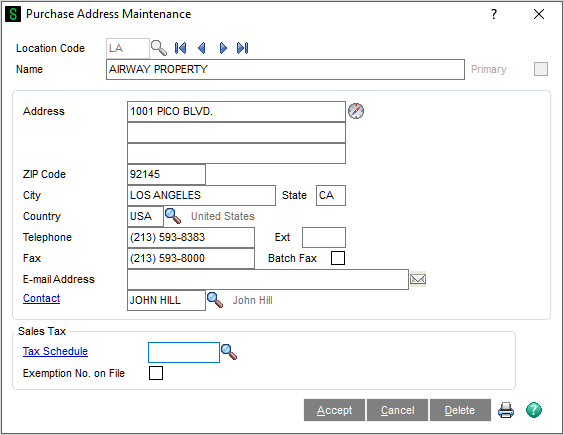
-
Select > > Vendor Maintenance.
-
Enter the vendor number. Click the drop-down arrow in the top-right corner of the window, and then click Purchase Address.
-
In the Purchase Address Maintenance window, enter the location code.
-
In the Tax Schedule field, enter a sales tax schedule and click .
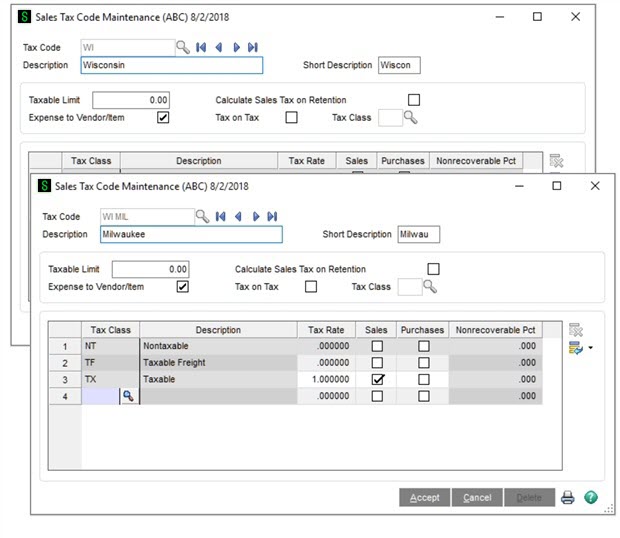
Understanding How Sales Tax is Calculated
This lesson provides an example of how sales tax is calculated. The example uses the WI (Wisconsin) and WI MIL (Milwaukee) sales tax codes:
-
The WI (Wisconsin state tax) sales tax code is set up to calculate sales tax at a rate of 5% on all sales and purchases for items assigned to the Taxable tax class. It will not calculate sales tax on other tax classes.
-
The WI MIL (Milwaukee city tax) sales tax code is set up to calculate sales tax at a rate of 1% percent on all sales for items assigned to the Taxable tax class. It will not calculate sales tax on purchases or items assigned to other tax classes.
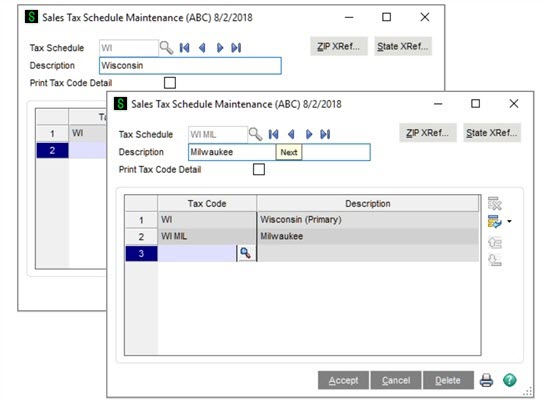
The example also uses the WI (Wisconsin) and WI MIL (Milwaukee) sales tax schedules:
-
The WI (Wisconsin) sales tax schedule has the WI sales tax code assigned to it.
-
The WI MIL (Milwaukee) sales tax schedule has both the WI sales tax code and the WI MIL sales tax code assigned to it because Milwaukee city requires that both state and city tax be calculated for taxable items.
Example - How Sales Tax is Calculated in Accounts Payable
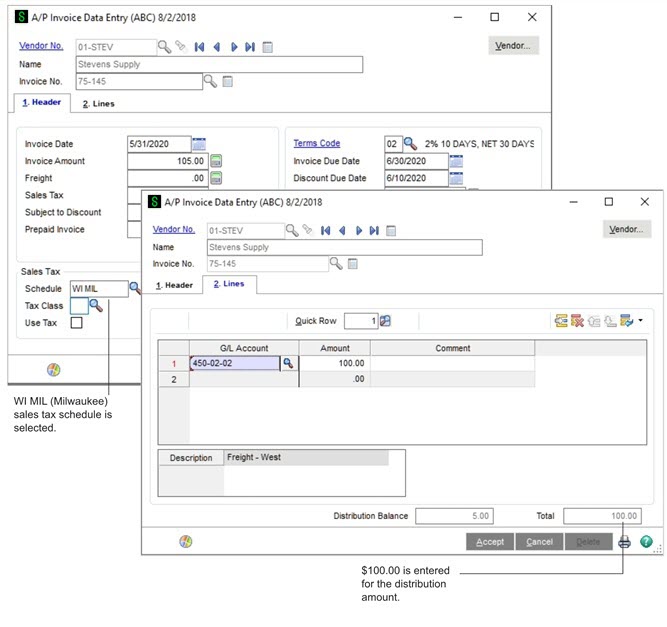
This example shows how sales tax is calculated on Accounts Payable invoice 75-145. Invoice 75-145 has the following settings:
-
On the Invoice Data Entry Header tab, the WI MIL tax schedule is selected.
-
On the Invoice Data Entry Lines tab, the total distribution amount for this invoice is $100.00. This is the total purchase amount that is taxable.
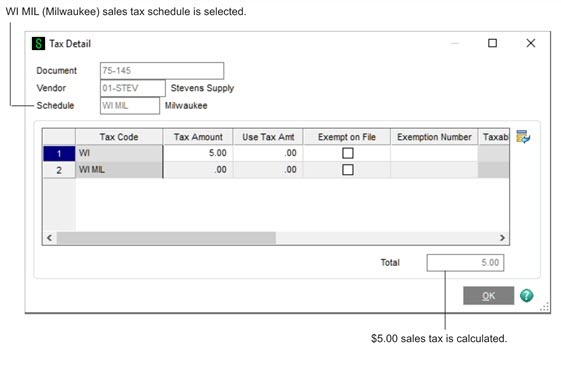
Tax Calculated Using the WI MIL (Milwaukee) Sales Tax Schedule
To view how tax is calculated for invoice 75-145, on the Invoice Data Entry Header tab, click Tax Detail. In the Tax Detail window, you can see that $5.00 (100 x 5%) in sales tax has been calculated for the WI MIL (Wisconsin) sales tax schedule.
Remember that the WI MIL tax schedule calculates tax for both WI (Wisconsin state) and WI MIL (Milwaukee city) sales tax codes. Also, keep in mind that the WI sales tax code is set up to calculate sales tax on items which are purchased (the Purchases check box is selected in Sales Tax Code Maintenance), but the WI MIL tax code is not set up to calculate sales tax on items which are purchased (the Purchases check box is cleared in Sales Tax Code Maintenance). Therefore, sales tax on purchased items is calculated only for the WI (Wisconsin) state tax code even though both tax codes (WI and WI MIL) are included in the WI MIL tax schedule.
Changing Sales Tax Information
After setting up sales tax information, you may need to modify the sales tax information defined in Sales Tax Class Maintenance, Sales Tax Code Maintenance, or Sales Tax Schedule Maintenance. For example, the sales tax rate for a tax jurisdiction changed.
Note: This lesson assumes that sales tax information has been set up and sales tax has already been calculated on transactions.
-
On the Library Master Setup menu, select one of the following:
-
Sales Tax Class Maintenance
-
Sales Tax Code Maintenance
-
Sales Tax Schedule Maintenance
-
-
A warning message appears informing you that changes you make may impact sales tax calculations and reporting. Click .
-
Make the necessary changes and then click .
-
You must recalculate the sales tax previously calculated on unposted invoices, sales orders, purchase orders, manual checks, returns, and so on.
Warning! Before recalculating sales tax, back up all data files.
To recalculate sales tax, select one of the folloing:
-
> > Sales Tax Calculation
-
> > Sales Tax Calculation.
-
-
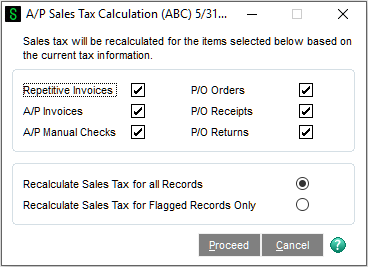
In the Sales Tax Calculation Utility window, select one of the following options:
-
Select the Recalculate Sales Tax for all Records option to recalculate taxes for all records.
-
Select the Recalculate Sales Tax for Flagged Records Only option to recalculate taxes for only those records that are flagged as invalid tax calculation.
-
-
Click to recalculate the sales tax.
When sales tax is recalculated, the following occurs:
-
Only unposted transactions are affected. This includes sales orders, purchase orders, and unposted invoices.
-
Posted transactions are not modified. If the amount of sales tax calculated was incorrect, you must manually adjust the invoice through a credit memo or debit memo.
-
Recurring invoices are updated if they contain sales tax information.